Start Zabbix Web Installer
Zabbix web installer can be access using following url and follow the steps as per given screen shots below.
http://monitor.esprida.com/zabbix/
http://monitor.esprida.com/zabbix/
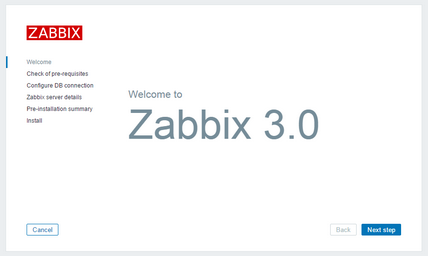
Zabbix Setup Welcome Screen
This is welcome screen of Zabbix web installer. Go forward by click on next button.
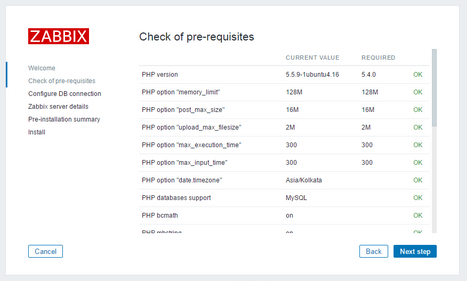
Check for pre-requisites
Check the system has all required packages, if everything is ok click next.
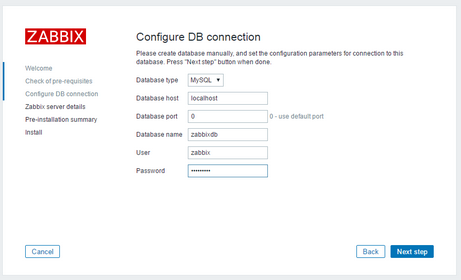
Configure DB Connection
Enter database details created in Step 2.6 and click Next step.
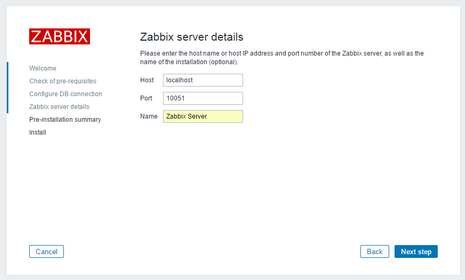
Zabbix Server Details
Enter the Zabbix server hostname as a “localhost” and port is “10051” and click next.
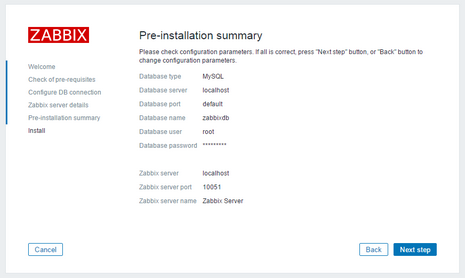
Pre-Installation Summary
In this step, show the summary you have entered previous steps, so simply click next.
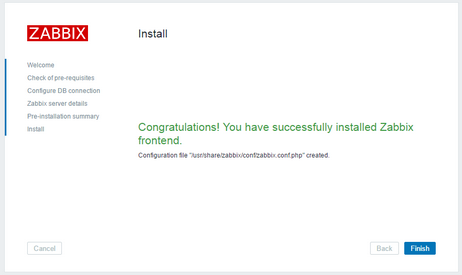
Install Zabbix
Once everything finish it is shows like below screenshot. Finally click finish.
Zabbix Login Screen
Login to Zabbix using below default credentials.
Username: admin
Password: zabbix
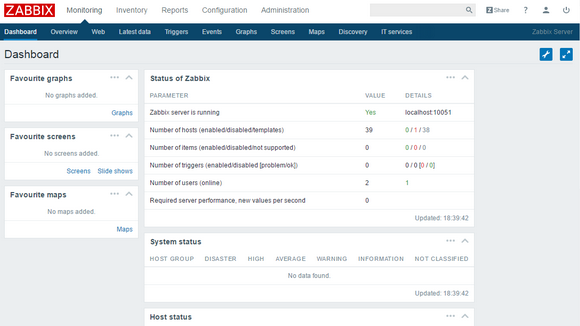
After successful login, you will get Zabbix dashboard like below.
# chkconfig
# chkconfig --add zabbix-server
By default, Zabbix Server is automatically added on startup option and not enable.
# zabbix-server 0:off 1:off 2:off 3:off 4:off 5:off 6:off
Type following command for enable and after enabled it is show like below.
# chkconfig zabbix-server on
# chkconfig
# zabbix-server 0:off 1:off 2:on 3:on 4:on 5:on 6:off
In CentOS7 and Redhat7 use following command to enable auto startup option.
Password: zabbix
After successful login, you will get Zabbix dashboard like below.

Add the Zabbix Server to automatically startup.
Type the chkconfig on CentOS 5/6 and RedHat 5/6 check Zabbix Server are available and enabled on that. If not available, use following command to add that.# chkconfig
# chkconfig --add zabbix-server
By default, Zabbix Server is automatically added on startup option and not enable.
# zabbix-server 0:off 1:off 2:off 3:off 4:off 5:off 6:off
Type following command for enable and after enabled it is show like below.
# chkconfig zabbix-server on
# chkconfig
# zabbix-server 0:off 1:off 2:on 3:on 4:on 5:on 6:off
In CentOS7 and Redhat7 use following command to enable auto startup option.
# systemctl enable zabbix-server
Created symlink from /etc/systemd/system/multi-user.target.wants/zabbix-server.service to /usr/lib/systemd/system/zabbix-server.service.
Previous Post
Created symlink from /etc/systemd/system/multi-user.target.wants/zabbix-server.service to /usr/lib/systemd/system/zabbix-server.service.
Previous Post


Comments
Post a Comment