Posts

Showing posts with the label Zabbix

Start Zabbix Web Installer
Image
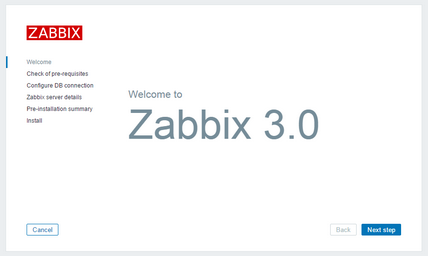
Zabbix web installer can be access using following url and follow the steps as per given screen shots below. http://monitor.esprida.com/zabbix/ Zabbix Setup Welcome Screen This is welcome screen of Zabbix web installer. Go forward by click on next button. Check for pre-requisites Check the system has all required packages, if everything is ok click next. Configure DB Connection Enter database details created in Step 2.6 and click Next step. Zabbix Server Details Enter the Zabbix server hostname as a “localhost” and port is “10051” and click next. Pre-Installation Summary In this step, show the summary you have entered previous steps, so simply click next. Install Zabbix Once everything finish it is shows like below screenshot. Finally click finish. Zabbix Login Screen Login to Zabbix using below default credentials. Username: admin Password: zabbix After successful login, you will get Zabbix dashboard like below. Add the Zabbix Server to automatically startup. T...

Install Zabbix Server with MySQL

Configure Yum Repository Zabbix repositories package on Zabbix official website. http://repo.zabbix.com/zabbix/ . You can follow below commands to add Zabbix repository in the system. Install latest rpm package every time. # rpm -Uvh http://repo.zabbix.com/zabbix/3.0/rhel/7/x86_64/zabbix-release-3.2.1-1.el7.noarch.rpm # rpm -qa | grep zabbix Install Zabbix Server with MySQL You have added Zabbix yum repository in above step. Now use following command to install Zabbix server with MySQL database support packages on server. # yum install zabbix-server-mysql zabbix-web-mysql zabbix-agent zabbix-java-gateway Setup Zabbix Apache Configuration Zabbix creates its own apache configuration file /etc/httpd/conf.d/zabbix.conf. Edit this file and just update timezone. php_value date.timezone America/Toronto   Restart the Apache service.   # service httpd restart   Create Zabbix MySQL Database This installation is using MySQL as backend of Zabbix, So we...

Setup Apache, MySQL and PHP

In order to use Zabbix we required a Web Server, database server and PHP to work. Please follow below steps one by one. Read first article from here . Install All Services. Install services using following commands. # yum install httpd httpd-devel # yum install mysql mysql-server # yum install php php-cli php-common php-devel php-pear php-gd php-mbstring php-mysql php-xml Start All Services Start MySQL and Apache services. # service httpd start # service mysqld start MySQL Initial Setup Run following command to setup MySQL initially and secure it. Create one database admin user for access through sqlyog. # mysql_secure_installation Previous Post                                                                                         ...

How to Install Zabbix Server 3.0 on RHEL 7/CentOS 7

Image
Zabbix is an open source software for networks and application monitoring. Zabbix provides agents to monitor remote hosts as well as Zabbix includes support for monitoring via SNMP, TCP, Trap and ICMP checks. More detail about Zabbix visit to: http://www.zabbix.com/ Basic requirements to run Zabbix 3.0 The minimum software requirements for each are as follows: ·     RedHat Enterprise Linux 7 (RHEL7 or CentOS7) ·     Apache: 1.3.12 or later. ·     PHP: 5.4.0 or later (PHP 7 not supported). ·     MySQL: 5.0.3 or later. ·     OpenIPMI: Required for IPMI support. ·     libssh2: Required for SSH support. Version 1.0 or higher. ·     fping: Required for ICMP ping items. ·     libcurl: Required for web monitoring. ·     libiksemel: Required for Jabber support. ·     net-snmp: Required for SNMP support.                   ...